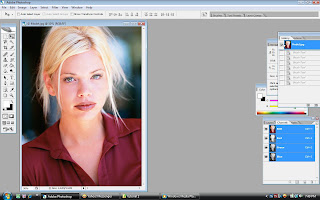
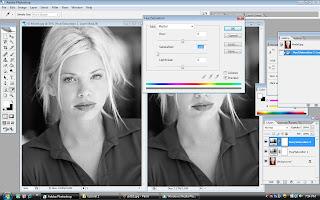
alright now lets move on to the another image; the model..started with..
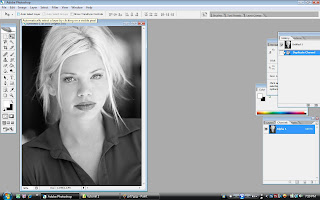
i converted the image into the grayscale
the duplicated the gray channel, with new one
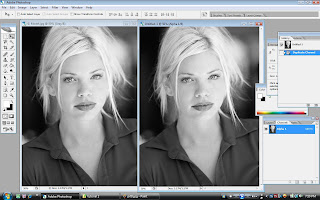
undo the grayscale filter for the original image..went to the layer pallete then choose the hue/saturation, just clicked ok.
created another hue/saturation again and this time dragged the saturation to -100, into grayscale back for the original image..and clicked ok. now both of the images are identical.
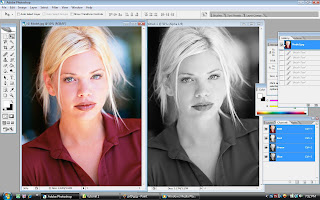
 now, i went back to the hue/saturation layer that i made at the first place, there are editting for colors, ctrl+1 for red, ctrl+2 yellow, ctrl+3 green, ctrl+4 cyan, ctrl+5 blue and ctrl+6 magentas. now i used red first and dragged the lightness to -25..
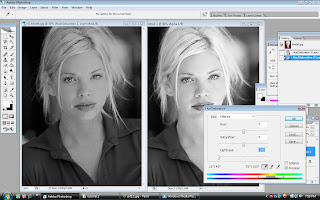
with ctrl+2 for yellow, the lightness went to -100 so that we can see the blond hair more clearly..

now with ctrl+3, the green with -64
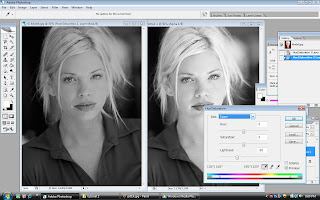
ctrl+4, the cyans with -26

because of the magentas doesnt show any changes, i just skipped that part and went to ctrl+5 for the blue with -91..
then i zoomed in both of the images..
now you can see the differences..right is the normal grayscale and the left is the grayscale that have been editted..


 i changed the picture by using filter then sketch gallery, and i chose photocopy..
 went to the stroke below the layer place, clicked on stroke then make some changes to get the border..
 created a new layer, then i picked a brush tool, which is special effect brush, that butterflies, placed it at the corner. then new layer again, i chose the text, as the title, Malaysia Truly Asia with brush script std, size 48pt then placed it at the same corner. finished for background..easy rigth..


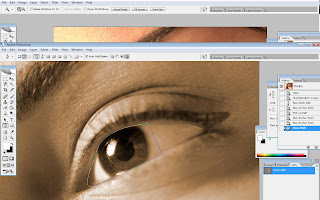
 with pen tool, selected the path, i drew a path as shown on the image. while the cursor at the path pallet, pressed ctrl key and clicked it. then i went to the channel pallet, and clicked on new channel, now i have an alpha 1. click ctrl+d for deselect and went to the new path to create another path on the eye..and i repeated the same work as i did before. and there is alpha 2. now i have two selection that i made from the path i've made.
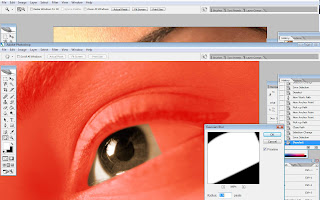
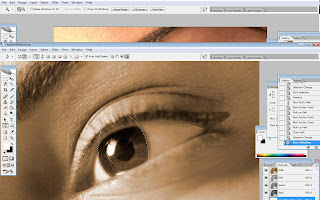
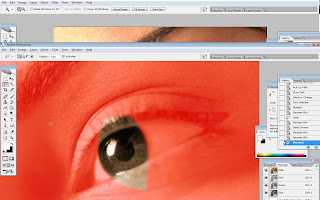
 clicked the alpha 1 and the clicked on the visibility of RGB, then this image appeared. then set the gaussian blur to 2.5 pixels.
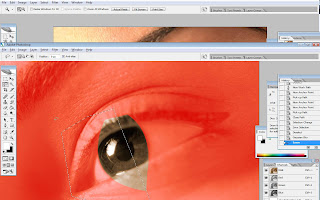

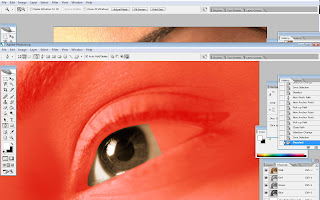
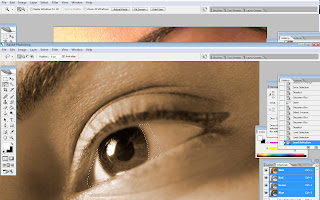 Pressed ctrl+d to deselect and select RGB. then clicked ctrl key and click alpha 1, and shift+ctrl + alpha 2 to combine alpha 1 and 2.For undo that, ctrl+alt to minus the part of the alpha 2.For indo, ctrl+alt+shift+alpha 2 for the overlapping area. then i clicked on layer pallet, hue/saturation and made the adjustment and selected any color for the eye..
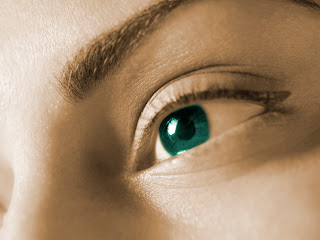


 by using brush and the size of 200, with color mode, black, then i made the above side grayscale in a new layer. i changed the size of brush follow the smaller part; the finger..can include the nail also..
 on the path, click the layer on that path and hold the ctrl key at the same time.
 then go to the layer, search the hue/saturation..
 from the hue/saturation, i changed the color of the sofa..
 then by using brush with smaller size, to color the nails, i went back to the hue/saturation and choosed any color that i like for every each of the fingernail.


